
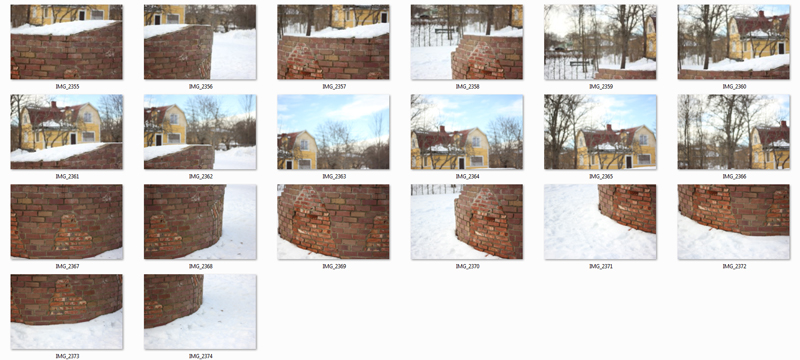
How to shoot a photo in the style of Ryan Brenizer, or my friend O Caritas. The effect you want is an impossible shallow depth of field. For this photo of the sculpture The Tower by Jan Håfström, I used my fixed 50mm lens at f1.8 (the smallest number),and a shutter speed of 1/1250 sec. It was a sunny day so I shot at ISO 100 with the white balance set on sunny. For this scene I used the 20 photos you can see in the screen grab. I shot using small JPG. If you use RAW, your computer will probably protest when it is time to stitch the photos together. I then positioned myself close to the object and took one photo with the auto focus on. I then turned to manual focus and started covering the object, shooting from left to right with a lot of overlapping. If you need more info and a free stitching software read this article at photojojo.


7 comments:
I need to visit for some lessons. Wonderful job.
Nice technique!
Well done
Thank you for the explanation. I looked this up when you mentioned it recently and still did not understand it.
Glad that a few of the more photo interested people still drop by for a comment or two!
I can see the results are so good Steffe, but like I said before I'm more than happy to view this technique through your work :)
Steffe, thanks for the link to the photojojo.com site which gives a very clear explanation of both WHAT the Brenizer method is, and how to shoot in that method! I've been meaning to research the term since you started posting photos using that technique, but thanks to this link, I've got all the info I need to start experimenting!
Post a Comment